
Published · 16 min read
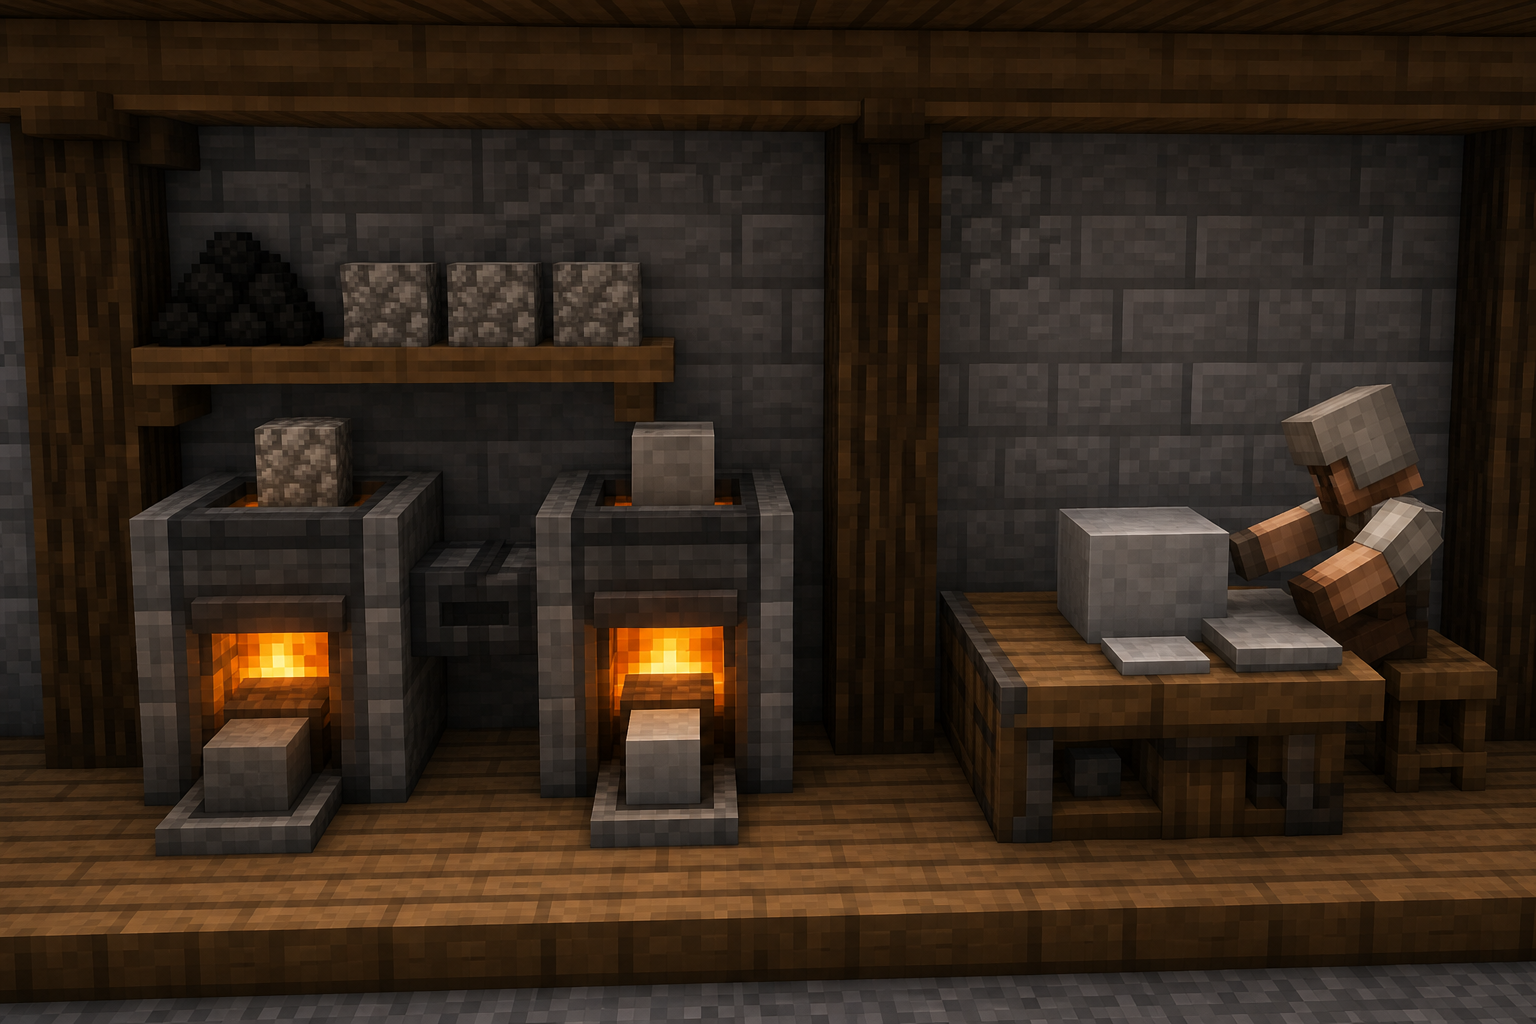
How to make an armor stand, fast: gather 6 sticks and 1 smooth stone slab, smelt 1 cobblestone to stone (10s) then that stone to smooth stone (10s), cut it in a stonecutter for exactly 2 smooth stone slabs (you’ll use 1), and craft on a 3×3 with sticks in the entire top row, a single stick in the center, and sticks in both bottom corners with the smooth stone slab in the bottom-center. Use 2 wooden planks as furnace fuel instead of 1 coal to avoid overkill for just two smelts.
This guide also nails edition quirks: Java armor stands craft without arms and need commands or datapacks to add them, while Bedrock stands have arms and a built‑in pose picker. Auto‑equip is trivial in both editions: aim a dispenser at the stand, power it with a button or pressure plate, and it slots armor from the dispenser’s top slot instantly. See Java vs Bedrock specifics inside.
Want a safe sandbox to test poses and redstone? Hop on Creative servers via /gamemodes/creative, or try Survival SMPs like DonutSMP or the Vanilla hub on McHub. We’ll show how to make an armor stand in under ~4 minutes, the zero‑waste fuel plan, and the smooth stone math so you don’t craft 6 unnecessary slabs.
How To Make Armor Stand In Minecraft - Full Guide · GuideRealm
- Exact recipe (3x3): Sticks at (1,1) (1,2) (1,3) (2,1) (2,3) and (3,2); Smooth Stone Slab at (2,2) → outputs 1 armor stand.
- From scratch in ~3–4 minutes: 6 smelts (~60s), crafting (~20s), mining/logging (~90s) for 6 sticks + 1 smooth stone slab.
- Edition split: Bedrock spawns stands with arms and 13 poses; Java spawns armless (use ShowArms:1b); both accept armor and elytra.
- Dispenser auto-equip: one item per pulse onto the stand; build four facing dispensers (one per slot); hand items require arms.
Materials and time budget: the 4‑minute armor stand
Here’s how to make an armor stand in about 3–4 minutes: gather 6 sticks, smelt 3 cobblestone to 3 stone and then to 3 smooth stone (6 smelts ≈60 seconds), craft 1 smooth stone slab from those 3 blocks, and assemble the recipe. Final materials are 6 sticks + 1 smooth stone slab; from true zero you only need ~3 cobblestone, 4 planks for sticks (crafts 8, 2 spare), and fuel equal to 1 coal or roughly 8 planks. On both Java and Bedrock the ingredient list matches, so the time budget doesn’t change between editions. Run the furnace in two batches: 3 cobble → 3 stone (≈30s), then 3 stone → 3 smooth stone (≈30s); a single furnace is enough if you queue items cleanly. One coal powers all six smelts; using planks, keep ≥8 so you don’t stall mid‑cycle. While the first batch cooks, craft 8 sticks from 4 planks and prep the grid; when the smooth stone finishes, craft the slab (3 blocks → 6 slabs) and finish the stand immediately. Expect ~90 seconds for tree chopping and mining with a wooden pickaxe, then ~15–20 seconds for the actual crafting clicks. If you’re speedrunning how to make an armor stand, open with 1 coal from a surface vein or 8 planks and chain the two smelt batches with zero downtime. These numbers give a repeatable, edition‑agnostic plan for how to make an armor stand with minimal waste and under four minutes of real time.
Exact grid: the armor stand recipe layout (1.20+)

Use a 3×3 crafting table: place Sticks in (1,1), (1,2), (1,3), (2,1), (2,3), and (3,2), a Smooth Stone Slab in (2,2), leave every other slot empty, then take the single Armor Stand output.
- Open a Crafting Table (3×3): The armor stand recipe cannot be made in the 2×2 inventory grid; it requires a full 3×3 crafting table. If you’re figuring out how to make an armor stand on Bedrock mobile, switch to the Classic UI to access the 3×3 layout.
- Use coordinate placement: Read positions as (row, column) with the top-left slot as (1,1), top-right as (1,3), and bottom-middle as (3,2). This coordinate map is the precise answer to how to make an armor stand with the Minecraft crafting grid.
- Place the six Sticks: Fill the top row with Sticks at (1,1), (1,2), and (1,3); add side Sticks at (2,1) and (2,3); finish with the bottom-center Stick at (3,2). Do not place Sticks in (3,1) or (3,3) — those must stay empty for the shaped recipe to work.
- Center the Smooth Stone Slab: Put exactly 1 Smooth Stone Slab in (2,2) — the middle slot of the grid. Regular Stone Slab will not produce an Armor Stand in Java 1.20+ and modern Bedrock, so smelt stone into smooth stone first if needed.
- Leave other slots empty and craft: All non-listed slots must remain blank; any extra item breaks this shaped recipe. Use the quick-craft take (Shift-click on Java) to pull the result — you’ll get 1 Armor Stand per 6 Sticks + 1 Smooth Stone Slab; stack materials to craft several rapidly.
- Verify output and placement rules: If no output appears, recheck (2,2) for the Smooth Stone Slab and confirm you used six Sticks in the exact coordinates. On multiplayer, region protections can block placing armor stands; test in singleplayer or on a Creative world before relying on this how to make an armor stand recipe for a build.
Java vs Bedrock: does anything change for armor stands?
Yes—crafting is identical (6 Sticks + 1 Smooth Stone Slab), but behavior differs: Bedrock armor stands spawn with arms and 13 built-in poses you cycle by crouching and interacting, while Java armor stands spawn armless and have no pose cycling unless you use commands or data packs.
If you’re comparing how to make an armor stand across editions, the 3x3 grid layout stays the same; the differences below determine posing, arm visibility, and how servers handle placement.
| Feature | Java Edition | Bedrock Edition |
|---|---|---|
| Crafting recipe | Same how to make an armor stand recipe: 6 Sticks + 1 Smooth Stone Slab. | Same how to make an armor stand recipe: 6 Sticks + 1 Smooth Stone Slab. |
| 3x3 grid layout | Top: Stick, Stick, Stick; Middle: (blank), Stick, (blank); Bottom: Stick, Smooth Stone Slab, Stick. | Top: Stick, Stick, Stick; Middle: (blank), Stick, (blank); Bottom: Stick, Smooth Stone Slab, Stick. |
| Default arms | No arms by default; requires commands or a data pack to show arms. | Arms enabled by default on placement. |
| Armor stand poses (controls) | No built-in pose cycling; use commands, data packs, or server plugins to set poses. | 13 preset poses; crouch/sneak + interact to cycle (tap/trigger on touch/controller). |
| Equippable items | Accepts all armor slots and Elytra; right-click to equip or remove. | Accepts all armor slots and Elytra; tap/interact to equip or remove. |
| Base plate visibility | Visible by default; can be hidden only via commands. | Visible by default; can be hidden only via commands/add-ons. |
| Server placement rules | Often restricted in claimed/protected areas; check server perms or use a plot on Creative servers from the Java list. | Often restricted in realms/claims; confirm permissions or use worlds from the Bedrock list with building enabled. |
Takeaway: how to make an armor stand never changes between editions—only the default arms and pose controls do, so craft it the same way and then adapt your posing method to Java or Bedrock.
Why won’t my recipe work? 5 fast checks
If your armor stand recipe won’t craft, confirm these five points right away: you used a smooth stone slab (not a regular stone slab); the bottom-center stick is in the middle of the bottom row; you’re on a 3×3 crafting table (inventory 2×2 won’t work); no data pack/mod has overridden the recipe; and the recipe book isn’t filtering it out—place items manually to bypass the UI. If you searched how to make an armor stand and still get nothing in the output slot, one of those blockers is almost always the culprit.
Verify materials and layout precisely: smelt cobblestone → stone → smooth stone, then craft 3 smooth stone into 6 smooth stone slabs; place sticks as top row: stick | stick | stick; middle: stick | smooth stone slab | stick; bottom: empty | stick | empty. If you’re testing how to make an armor stand on a server, mods or data packs can change vanilla recipes; try a clean singleplayer world, or a server labeled Vanilla like McHub to compare. Conversely, Modded listings such as KingMC may legally alter crafting, so ask staff or check their docs. Finally, the Java recipe book’s “Craftable” filter can hide the pattern; toggle it or ignore it and craft by hand—how to make an armor stand still resolves as long as the six sticks and one smooth stone slab are in the exact grid.
data packs; if the pattern works there, your server/modpack changed it—ask for its custom “armor stand” recipe.Can I give an armor stand arms in Survival?
How to add Arms to an Armor Stand in Minecraft Java Edition · DigMinecraft
No on Java Survival without extra tools, yes on Bedrock: Java armor stands spawn armless and require commands or a data pack to enable arms, while Bedrock armor stands have arms by default, can holditems, and cycle through 13 poses.
Java Edition detail: default armor stands have no arms, and pure Survival gameplay doesn’t add them. The only vanilla method is a command or data pack; with cheats enabled or sufficient server perms, run/ to toggle arms on the nearest stand. On multiplayer, ask admins if an armor-stand editor data merge entity @e[type=armor_stand,limit=1,sort=nearest] {ShowArms:1b}data pack is installed; many publicJava servers restrict entity-editing commands to staff.
If you’re just checking how to make an armor stand, remember the Java recipe never includes “arms” as an ingredient or toggle—arms are an entity property, not a crafting output. On community Survival worlds such as OPLegends or DonutSMP, open a ticket to confirm whether a plug-in or data pack lets you give armor stand arms without direct commands.
Bedrock Edition behaves differently: after you follow how to make an armor stand, it spawns with arms already present. Crouch (sneak) and interact on the stand to cycle 13 preset poses; interact while holding a tool, sword, or map to place it in the stand’s hand, then repeat to swap or remove it. This requires no commands and works in Survival on worlds and most Bedrock servers.
Planning Java vs Bedrock armor stand builds? The crafting steps for how to make an armor stand are straightforward on both, but only Bedrock grants arms by default; Java needs a command (ShowArms:1b) or a helper pack. If your Java server allows it, ask for an armor-stand editor data pack so you can rotate limbs precisely and give armor stand arms without operator access.
Fastest smooth stone route without waste
Mine 3 cobblestone, fuel a furnace with 1 coal or wood, smelt to 3 stone then to 3 smooth stone (~60 seconds total), and use a stonecutter to turn 1 into 2 smooth stone slabs so you have exactly what you need for how to make an armor stand, with no leftovers.
- Grab the raw blocks: Break any stone with a wooden pickaxe or better to collect 3 cobblestone. You only need three because a single smooth stone slab is all that’s required in Java for how to make an armor stand alongside 6 sticks.
- Load precise fuel: Place a furnace and add 1 coal (smelts up to 8 items) or wood planks. One plank smelts ~1.5 items, so 4 planks cleanly cover the 6 total smelts (3 cobble + 3 stone); use 8 planks if you plan to chain extra batches while doing Minecraft 1.20 crafting.
- Smelt cobble → stone: Smelt 3 cobblestone into 3 stone; a furnace processes one item in ~10 seconds, so this leg takes ~30 seconds. Don’t remove fuel mid-run—idle burn ticks waste fractions of a plank’s value.
- Smelt stone → smooth stone: Move the 3 stone into the top slot immediately so the same fuel finishes 3 smooth stone in another ~30 seconds. This keeps your total to 6 smelts, exactly matching 1 coal or 4 planks without leftover burn time.
- Cut only what you need: Use a stonecutter to convert exactly 1 smooth stone into 2 smooth stone slabs, then stash the other 2 smooth stone for later. If you lack a stonecutter, the 3×3 recipe converts 3 smooth stone into 6 slabs—but that leaves 5 extras for how to make an armor stand. Many survival hubs host public stonecutters; check spawn workshops on servers like AkumaMC or OPLegends to avoid crafting your own early.
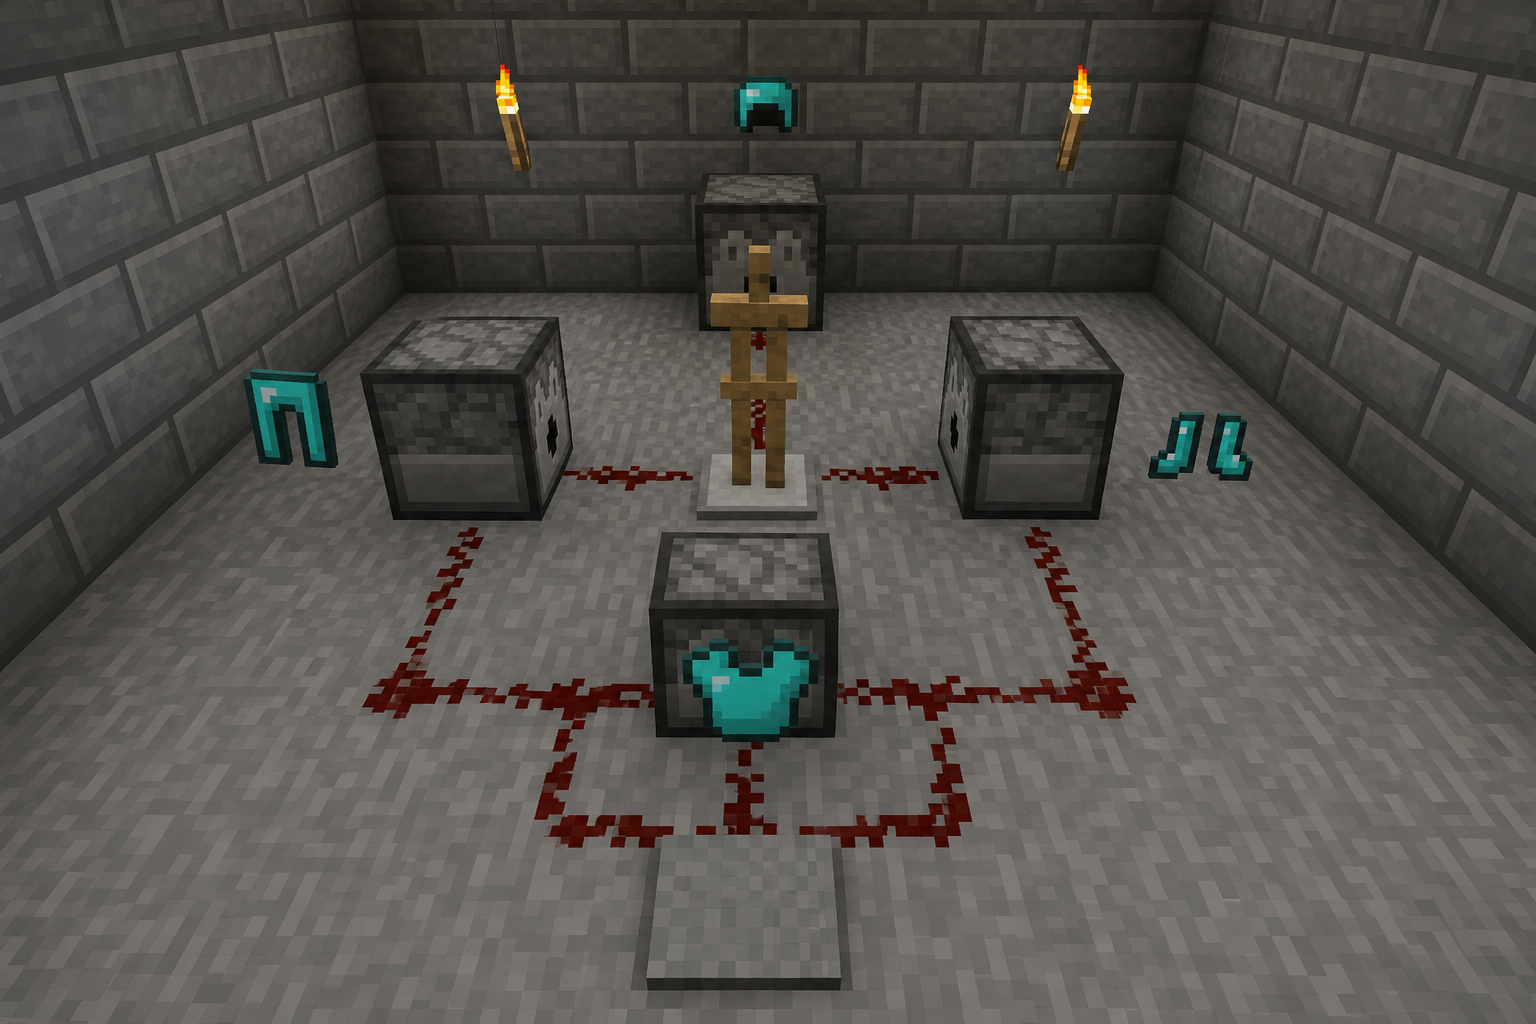
How do I auto‑equip gear onto an armor stand?
🦅 Minecraft Bedrock 1.20 | BEST ARMOR EQUIPPER TUTORIAL! · WingsOfEnd
Face a dispenser directly into the armor stand and power it; each redstone pulse equips one slot in order—helmet, chestplate or elytra, leggings, then boots. A button or lever sends a clean single pulse, which avoids double-firing. If you just wrapped up how to make an armor stand using the standard armor stand recipe, place the stand exactly one block in front of the dispenser’s face.
For a walk-up kit station, stack four dispensers vertically (top to bottom: helmet, chest, legs, boots) all pointing at the stand, and wire them to a floor pressure plate the player steps on. Use a short repeater ladder (1-tick increments) so the pulses cascade top-to-bottom instead of all at once. For a dispenser equip armor build, avoid droppers entirely—droppers never equip anything; only dispensers do.
Minimal parts list: 4 dispensers + 1 pressure plate + 3 repeaters + any power source; point all dispensers at the stand and stagger pulses top-to-bottom.
Handheld items need arms. On Bedrock, armor stands have arms by default, so a dispenser can place tools or weapons into the hand. On Java, enable arms first with a single command near the stand: /; without arms, hand items won’t stick, even if you know how to make an armor stand perfectly.data merge entity @e[type=armor_stand,limit=1,sort=nearest] {ShowArms:1b}
Placement rules are strict: the dispenser must face the block the stand occupies; diagonals or corners don’t work. Ensure each target slot is empty—if it’s filled, the dispenser typically spits the extra item onto the ground instead of swapping. For public survival hubs on servers like McHub or DonutSMP, add hoppers behind dispensers to auto-refill from a chest and keep kits flowing. Testing different kiosk layouts on a Creative plot is fast, and it pairs neatly with earlier steps on how to make an armor stand before moving the design to your main world.
Where can I test armor stands on servers safely?
Use a protected Creative plot or your own land claim on a Java or Bedrock server; hubs near spawn usually block entities, so test away from spawn and read entity-cap rules first. To practice how to make an armor stand and compare Java vs Bedrock armor stand posing, start on Creative servers for rapid iteration, then validate survival behavior on an SMP claim.
| Environment | Can you place armor stands? | Posing/tools available | Grief/clear risk | Where to try |
|---|---|---|---|---|
| Creative plot servers | Yes — anywhere inside your plot; spawn regions are usually protected. | Often includes editor plugins/commands; great for rapid how to make an armor stand recipe runs and pose testing. | Low — plots are protected from other players. | Creative servers |
| Java SMP (claimed land) | Yes — inside your claim; unclaimed spawn/roads are commonly locked. | No built-in pose cycling; use commands, datapacks, or server-side editors where allowed. | Low in claims; medium outside claims; check per-chunk entity caps in rules. | Java servers — e.g., DonutSMP, Complex Gaming, OPLegends |
| Bedrock servers/realms (claimed) | Yes — in your owned plot/chunk; some realms set strict entity limits. | Built-in pose cycling via sneak + interact; arms enabled by default. | Low in claims; near-spawn clears can remove unclaimed entities. | Bedrock servers |
| Public hub/lobby near spawn | Usually no — entity placement is disabled or instantly reverted. | N/A — region flags and anti-lag systems block armor stands entirely. | High — anything placed is wiped or staff-removed. | Example: Hypixel Network lobbies |
| Modded servers | Varies — depends on pack rules and claim systems. | Some mods add statue blocks or advanced posing; verify pack/version first. | Varies — automated cleaners may remove non-whitelisted entities. | Asteroid Testing Server, KingMC |
| Anarchy/open survival | Yes — placement is broadly allowed. | Vanilla posing only; expect no editor plugins. | Very high — grief and theft are common without protections. | Anarchy |
For reliable tests of how to make an armor stand, use a Creative plot or a personal claim on SMP; hubs and unclaimed areas either block placement or wipe entities quickly.
Frequently Asked Questions
What is the exact armor stand recipe and 3×3 layout?
Craft exactly one armor stand with 6 sticks + 1 smooth stone slab in the 3×3 Minecraft crafting grid: top row = stick, stick, stick; middle = stick, smooth stone slab, stick; bottom = empty, stick, empty. The recipe is unchanged since Java 1.8 and still valid in Minecraft 1.20+, on both Java and Bedrock.
Can I craft an armor stand in the 2×2 grid without a table?
No. The pattern needs seven ingredients and a 3×3 workspace, so the 2×2 inventory grid cannot place the center‑only bottom stick. Place a crafting table to access the full grid. If you’re speedrunning how to make an armor stand, keep a table in your hotbar while gathering sticks and stone.
How do I change armor stand poses on Bedrock Edition?
On Bedrock Edition, crouch (sneak) and interact with the armor stand to cycle through 13 preset poses; this works in Survival with no commands. A dispenser facing the stand can equip armor or tools automatically. For Java, poses require commands or a data pack; there’s no built‑in cycling.
How do I remove the base plate in Java and Bedrock?
Java: remove the base plate with NBT, for example /, or target an existing stand and use summon armor_stand ~ ~ ~ {NoBasePlate:1b,ShowArms:1b}/. Bedrock: base plates aren’t toggleable in standard Survival; you’d need an add‑on or command‑enabled world, which most servers disable.data merge entity @e[type=armor_stand,limit=1,sort=nearest] {NoBasePlate:1b}
Does a blast furnace help with smooth stone for the armor stand?
No. A blast furnace only processes ores and metal items; it cannot make smooth stone. Use a regular furnace: smelt cobblestone → stone (10 s), then stone → smooth stone (10 s). One coal smelts 8 operations, so a single coal yields four smooth stone. This is the most fuel‑efficient path for how to make an armor stand.
Do servers block armor stands or limit them?
Yes. Many public servers limit armor stands near spawn or cap entities per chunk to prevent lag. If you’re testing how to make an armor stand or poses, build inside your land claim on SMPs or use Creative servers. Minigame hubs like Hypixel Network block placement. See Java/Bedrock lists.
Minelist Team
A veteran Minecraft SMP tinkerer and server-list editor, they write step-by-step, edition-specific guides for crafting, redstone, and survival testing on public servers.